I took a break from TV Monday night in favour of the theatre, to see our local production of The Wizard of Oz. It was an instant hit. Despite Tin Man's constant wardrobe malfunctions (He lost his metal cod piece during his first dance number.), the whole play came together without a hitch. My friends and I agreed that the best thing of this production was the young girl who performed the role of Glinda the Good Witch of the North.


Showing posts with label The Wizard of Oz. Show all posts
Showing posts with label The Wizard of Oz. Show all posts
Tuesday, October 25, 2011
The Wizard of Oz: Show Night
I took a break from TV Monday night in favour of the theatre, to see our local production of The Wizard of Oz. It was an instant hit. Despite Tin Man's constant wardrobe malfunctions (He lost his metal cod piece during his first dance number.), the whole play came together without a hitch. My friends and I agreed that the best thing of this production was the young girl who performed the role of Glinda the Good Witch of the North.

Sunday, October 9, 2011
Arts Integra Theatre Presents The Wizard of Oz
The scenery is ready. The cast is rehearsing. Now for a taste of what is to come, a little slide show of the Keynote presentation.
Tuesday, September 27, 2011
The Wizard of Oz - Cyclone Projection
Monday, September 5, 2011
Set Design: Animating the Static Image
Well, I've been putting off working on the project for a few weeks. Now after a break, I am back at it. I thought I discuss how to take a perfectly static image and turn it into animation. Surprisingly no two scenes are made using the same method.
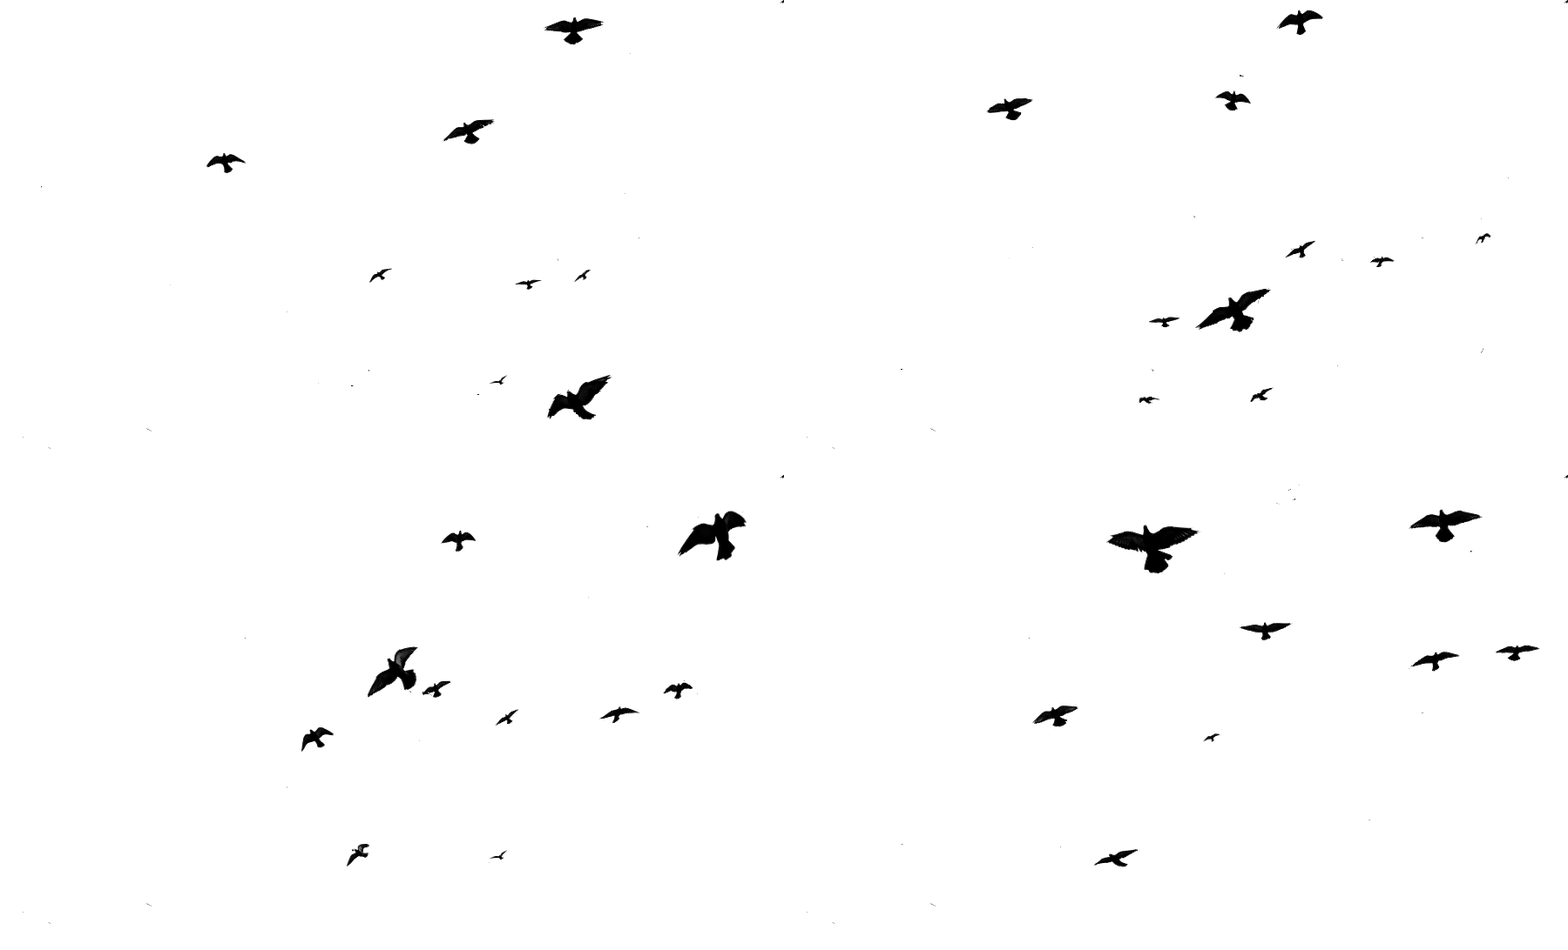
The first example I want to illustrate is the crows where Dorothy meet Scarecrow. For this scene, I needed to have crows flying in the distance. I chose an image that had a number of birds in flight. For some of them, it looked to me like flight paths.
 I cut out silhouettes of some of the birds and created four animating frames in GIMP to make the bird layers. Open the image in a new Window to see what I mean. The final animation includes the cornfield background.

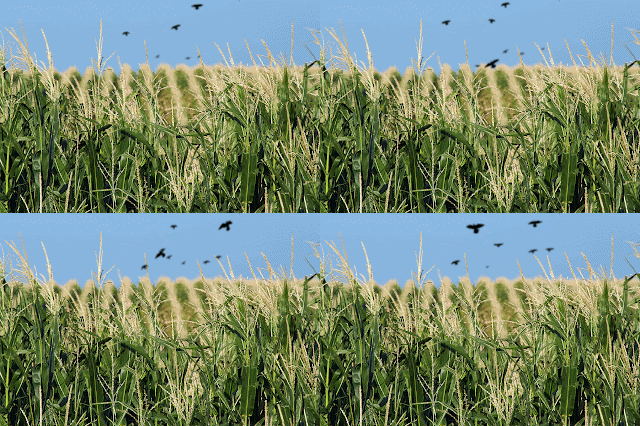 Every production tries to be different. We are adding Canada geese to our cyclone sequence. There was enough variety in the birds in this image to make it look like one bird was flying. I was able to cycle the frame for each position.
 Because the background is also animating, I want to scale the birds into place and add one to blow off screen. Open the image below to see the animation. I can't wait to see how it will look in Keynote.

The first example I want to illustrate is the crows where Dorothy meet Scarecrow. For this scene, I needed to have crows flying in the distance. I chose an image that had a number of birds in flight. For some of them, it looked to me like flight paths.



Saturday, August 20, 2011
Tuesday, August 16, 2011
Set Design: Using Keynote Textbox
I thought I would be posting the Quicktime video the textbox scenes in The Wizard of Oz, but the file size ended up being 3.4 megabytes. So I am posting screen captures instead.
The same effects is available to a textbox as it is for any picture object. For the intro, the text you see is moves into place and then fades out.

 What I found out was that with Keynote individual words and even letters can be manipulated too. This was really handy for the skywriting sequence. I incorporated three passes of the witch silhouette during the spelling of "SURRENDER DOROTHY OR DIE W.W.W." This feature is not available in PowerPoint.
 |
| The Wizard of Oz Intro |


Sunday, July 24, 2011
Set Design: Wizard of Oz Scenes Made in GIMP
What is GIMP? It stands for GNU Image Manipulation Program. In many ways, it is similar to Adobe Photoshop and in other ways it's more like Adobe Image Ready. I wouldn't know if I could have worked on this project without it. At first, I didn't know how much I would be using this application. I only had it to have an alternative means to make my a gif from my netbook. I knew it was something Linux users had at my previous job. Before using it for this project, I was just learning how to use it to make banners with it. Since then, I have found it much more intuitive for animating and have been making elements for the slides used in some of the scenes. For those who know GIMP, this will be nothing new. I just wanted to share my progress on this project.
 Starting with the flames for this chandelier, I began to understand that any layers in GIMP can be used animated. Cool! To make the candle flicker, I cut the image of a flame and applied the Animation Rippling filter. It saved me the trouble of animating it myself. I did have to ask my colleagues how to make it move. That's gave me the idea how it should look like.
How am I going to make flying monkeys with nothing but a two-dimensional image of a chimp and pasted on wings? Nothing seemed right. I couldn't push it across the Keynote slide like I did for the witch silhouette. That would be hard to do for more than one monkey. I had the idea to make a group of monkeys, but still had trouble with timing the movement. I made three layers of monkeys to use with this background. They were going to be small so you couldn't see the details too closely. I started with what ended up being the middle layer, 6 in the distant, 6 more a little closer to frame, and 4 more in front. For the second frame I scaled down and placed them where they would be in the previous frame. The third frame was the opposite. The first frame became the second frame and I had monkeys that seem to fly from the castle here.
Something else I noticed with the monkeys as with the chandelier. To reduce the file size, there is an optimize filter for gif. What this does is to combined the textures. Once this is done, you can't really edit the images again. The colours are indexed. To other applications the images still appear to be full frames.

I did a test already with transparent layers so I knew making a flaming mask was possible. I just didn't know what the mask would look like at the time. This was a render. As you can see, there is very little definition, I wasn't sure how the Colour to Alpha would work for it. It looked solid, so I knew that changing the brightness and contrast would make it a little bit more transparent. I wanted to deformed the eyes, but I didn't know which tools in GIMP to make that happen. It will also have reduced opacity in Keynote so the video flames will be seen past it as well. I still need this gif to be approved for production. Looking forward, I will be exploring the drawing tools for my needs.


 |
| 4 frames, delayed on each candle for variation |
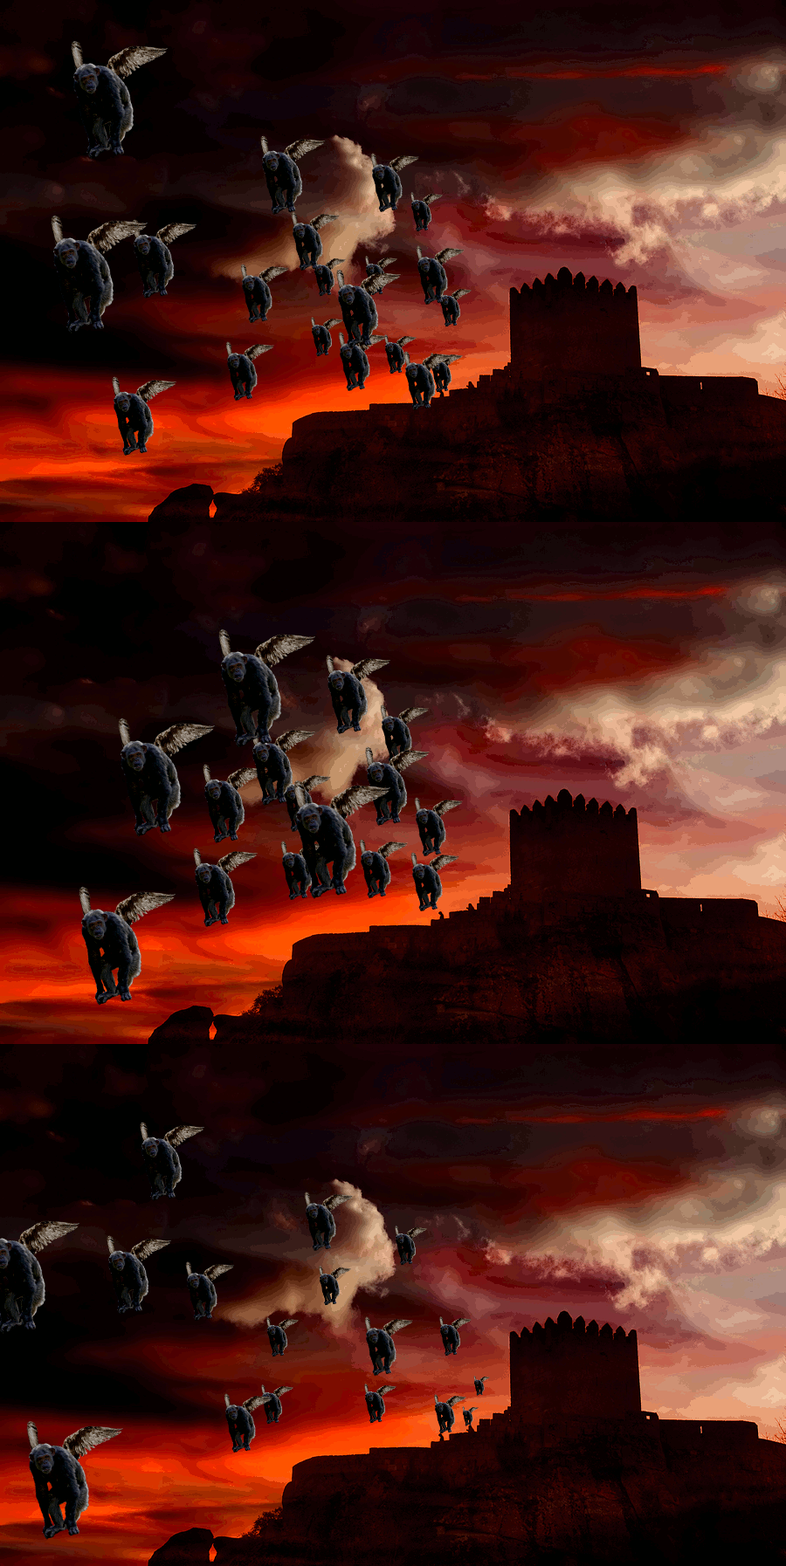 |
| 3 frames with monkey variation |

I did a test already with transparent layers so I knew making a flaming mask was possible. I just didn't know what the mask would look like at the time. This was a render. As you can see, there is very little definition, I wasn't sure how the Colour to Alpha would work for it. It looked solid, so I knew that changing the brightness and contrast would make it a little bit more transparent. I wanted to deformed the eyes, but I didn't know which tools in GIMP to make that happen. It will also have reduced opacity in Keynote so the video flames will be seen past it as well. I still need this gif to be approved for production. Looking forward, I will be exploring the drawing tools for my needs.

Saturday, June 18, 2011
Set Design: Wizard of Oz Projection Assembly

To my delight, the text you use in Keynote animates. Depending on which build you use, you can either affect the letter, word, paragraph or the entire selection as an object. (I think that feature is also in PowerPoint.) Next time, I will definitely share a sample QT video of this scene.
I won't have to work on this until July, so it will be a while. I will be trying to propose more alternatives for the animated sequences. I am confident, I can create more elements.
Saturday, June 11, 2011
Set Design: Wizard of Oz Opening Title Sequence
Finished going through the script. Beginning to assemble the projections today. Going to try variations of title transition. Fade in was the initial choice. Will try to slide it from the bottom next. With it being a text box, a jpeg of a black rectangle should be able to cover that bottom edge quite well. Hope to have much of slides in place by next weekend.
I should note that The Wizard of Oz music is licensed media. So the original audio for this video is disabled by YouTube.
Tuesday, June 7, 2011
Set Design: Wizard of Oz Cyclone Test
I made this video to show the potential of a still image can have over video to convey the movement of a twister for The Wizard of Oz background. Combine it with sound and lighting, it would be even more effective. To sell the idea to the production, I have added wind sound effects.
The feedback has been positive. I do hope we use this method. Still have to determine the duration of the cycle. Gotta compare my notes with the rest of production.
Sunday, May 29, 2011
Set Design: Wizard of Oz, Our Combined Vision

For nearly forty years this story has given faithful service to the Young in Heart; and Time has been powerless to put its kindly philosophy out of fashion.
To those who have been faithful to it in return
...and to the Young in Heart --- we dedicate this picture.
(I am not sure why they are using the movie reference to the letter when we are doing everything to make it come alive on stage.)
Saturday, May 14, 2011
Set Design: Cyclone Animation

I have choices of how to animate the inside of the cyclone. (1) An animated filter on GIMP lets me use a wave filter to create frames for an animated gif. (2) The same image rotated to create a animation of spinning clouds. Will have to see which will work with Keynote best.
Saturday, May 7, 2011
Set Design: Progress on The Wizard of Oz


Samples of royalty-free images I am using to create the illusion.
The good news is, there will be an architect who worked on the last production of Cats will lend his skill in The Wizard of Oz. Next time, we are to meet to finalize what set construction will need in way of digital projection.
The progress:
On the drive to Unionville this morning, I realized that the cyclone sequence will be one long take, not intermixed with Dorothy's reaction. I will be getting audio cues to set up timing. Meanwhile, I can begin designing the elements that go with it.
Apparently there will be script changes.
As requested, I am to also provide the following:
- The cyclone travelling towards the foreground
- The witch's eyes, appearing to glare at the fearless foursome
- Flaming fireballs the witch tosses at Scarecrow
- Meeting the Wizard (I actually mocked up a slide show with multiple fades. I'll share the video, next time.)
- Flying monkeys
S-u-r-r-e-n-d-e-r- Dorothy or die! W. W. W.
There are a series of crystal ball sequences between the poppy field and snowfall (needing snowflakes that will matched the performers' snowflake hats).
The videos for them will be used as is in the presentation. (Can't wait to see how they look like).
OK. Not so daunting as I thought.
Sunday, May 1, 2011
The Wizard of Oz Script

I reviewed The Wizard of Oz script that will be used for our production. I was encouraged to give my opinion on what needs to be done. I am glad I did. There were scenes calling for effects from the movie. Given the resources I have at hand, I gave my recommendations. The projected elements simulate a movie. It is not really a movie. Animation will be a much more effective alternative. The simpler the better. I am confident they will agree. You can see how I can make the house fall down in a heap of dust, in the above image. If they don't mind stick figures and silhouettes, we can definitely make this happen.
Watched the movie again, as well as Dreamer of Oz (1990). That one was more for me as a writing inspiration. There was also a 1910 silent film and 1933 animated movie.
Saturday, April 2, 2011
Set Design: The Wizard Of Oz - Keynote Test
So this is my unofficial journal to document how the process of puting together stage scenery using electronic means.
I just spent a couple of hours learning the ins and outs of Apple Keynote. I really like the ease of using this application. Once I have collected the media, it was a matter of figuring out how the animation works. This is the mock-up video I created to show some of the slideshow features we may want to use for the show. There is a series of 6 slideshows, the last being a video effect.
Next time, I have to find out if we just need a QT video or the actual PowerPoint file, as there might be issues in exporting the latter.
Wednesday, March 23, 2011
Set Design: The Wizard Of Oz - PowerPoint Scenery
Official Start Day Today
Well. The past couple of weeks, I have been learning what I can about background projections for The Wizard Of Oz presented by Arts Integra. Since the set or scenery is largely comprised of a PowerPoint presentation, I'm tasked with collecting the images we will use to create each scene. I am volunteering my time and effort to help a friend out. So glad to know that this falls within my skill sets. I just spent the better part of an last hour watching tutorials on Youtube to learn how to create animation and embed video in a PowerPoint presentation. This will definitely be useful in creating the moving elements on that backdrop.
That's all I got for now.
Follow on Facebook if you are interested going to see this show.
Well. The past couple of weeks, I have been learning what I can about background projections for The Wizard Of Oz presented by Arts Integra. Since the set or scenery is largely comprised of a PowerPoint presentation, I'm tasked with collecting the images we will use to create each scene. I am volunteering my time and effort to help a friend out. So glad to know that this falls within my skill sets. I just spent the better part of an last hour watching tutorials on Youtube to learn how to create animation and embed video in a PowerPoint presentation. This will definitely be useful in creating the moving elements on that backdrop.
That's all I got for now.
Follow on Facebook if you are interested going to see this show.
Subscribe to:
Posts (Atom)
This is me...

- Xindilini
- My aspiration is to be better at telling stories. I only need a pencil and paper.